EyeSeal® Assembly Mounting
TO MOUNT THE EYESEAL® DEVICE ON THE CONTAINER, FOLLOW THESE STEPS
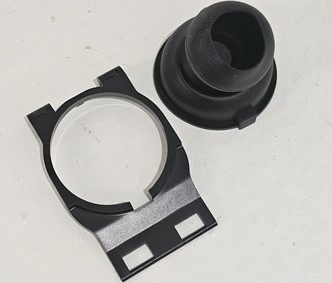
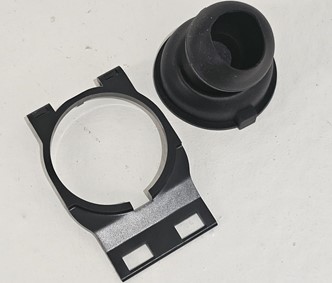
1. Boot and Clip – pre-assembly.
2. Assemble the Boot and Clip by aligning the square notch on the Boot with the square cutout on the Clip.
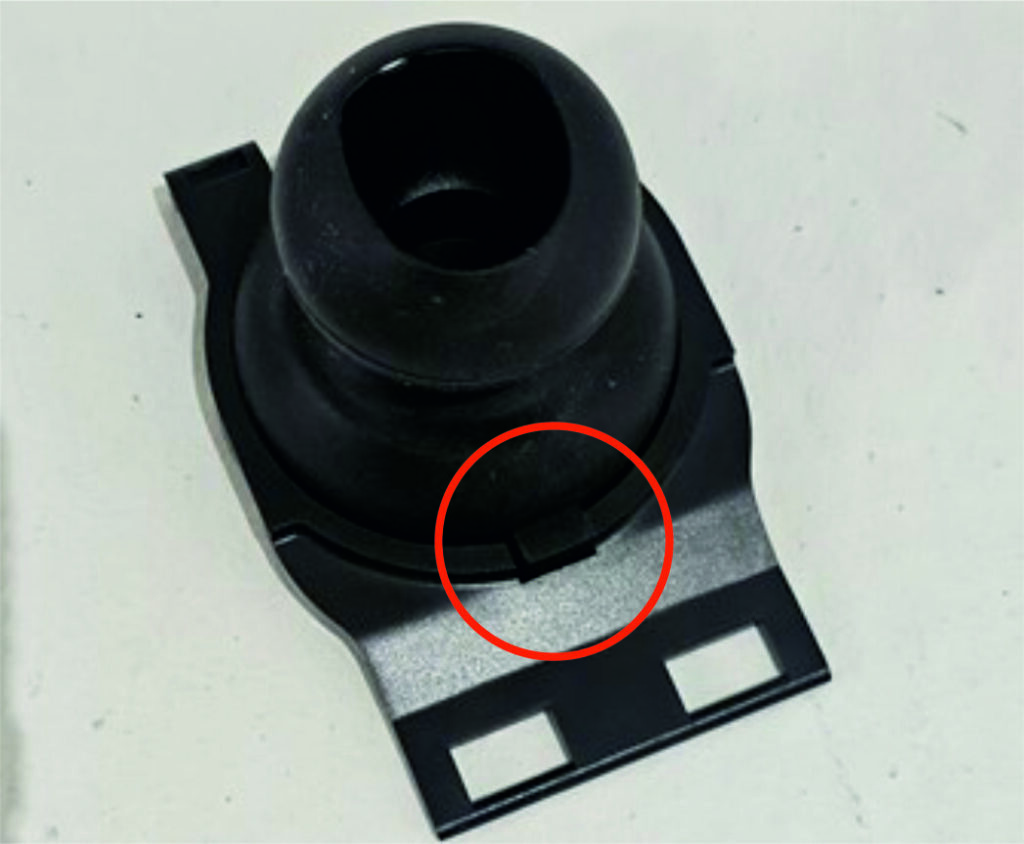
3. The assembled clip and boot are placed on the Device as shown. Please note the orientation of the assembly. Two tabs on the ‘top’ of the unit should be aligned as shown.
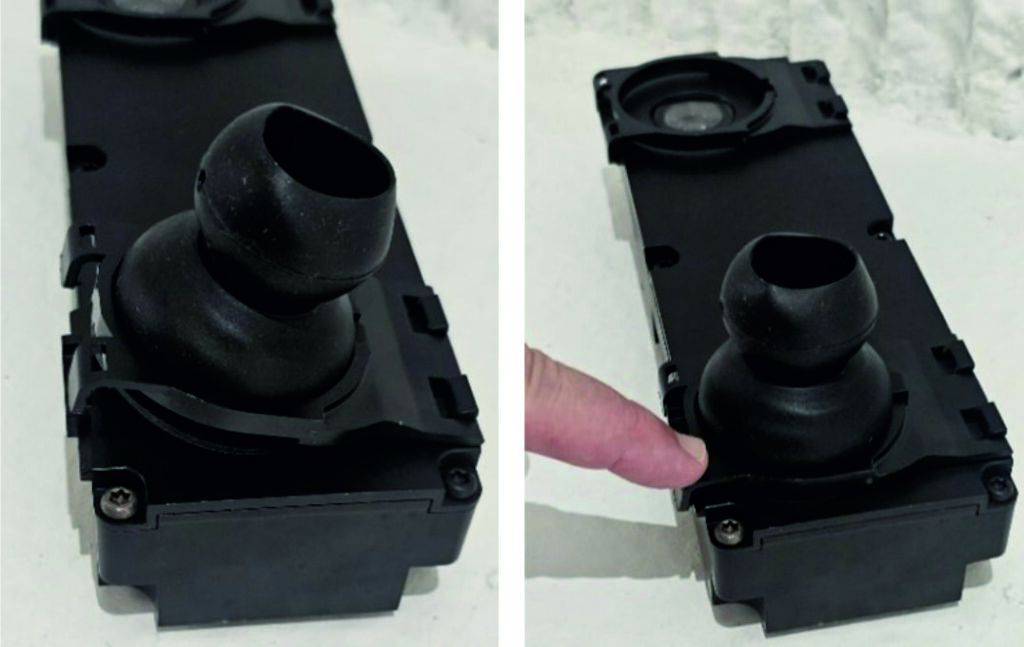
4. Then press down the Boot and the Clip will hook onto the bottom of the EyeSeal® Device.
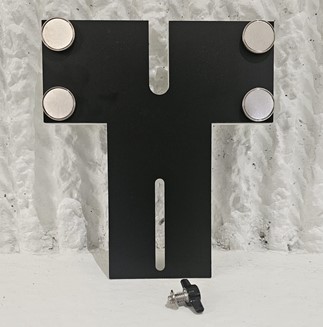
5. The Mounting Tool and Wing Nut are shown to the left.
6. The magnets of the Mounting Tool must face the outside of the container in the same direction as the Boots.
7. Attach the Mounting Tool to the Unit using the Wing Nut provided.
Note: Do not use other wing nuts or screws.
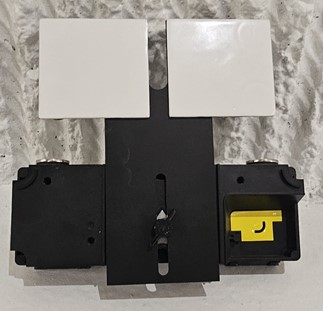
8. Please see below an example of the assembled Unit with Mounting Tool attached.
9. Wing Nut should be ‘finger tight’ to allow the Unit to move up and down when deployed in the Container.
10. “UNIT ON” – please note the Yellow Tab located at the rear of the Unit. This label is located over the Light Sensor.
11. Remove the Yellow Tab and the EyeSeal® Device is now functioning throughout the operating life of the device. All sensors are now enabled and collecting data. Handle the Device carefully to prevent ‘false-positives’.
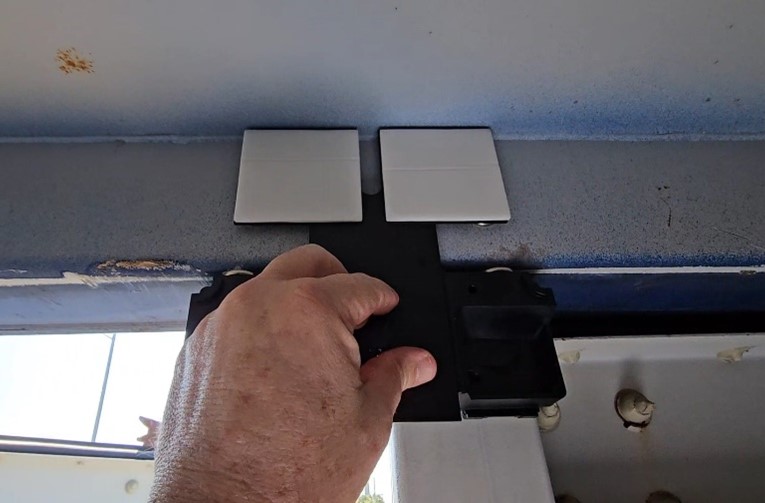
12. The Mounting Tool is to be aligned in the center of the two container doors. Also making contact with the roof of the Container as show. *** One ‘Closed Door’ may help with the process. When aligned, adjust EyeSeal to connect to the Top of Container Frame. When Attached Magnetically, Tighten the Wingnut.

13. The alignment of the ‘Mounting Tool’ is also confirmed by comparing the ‘distance’ and location between the external door lock fixtures as shown.
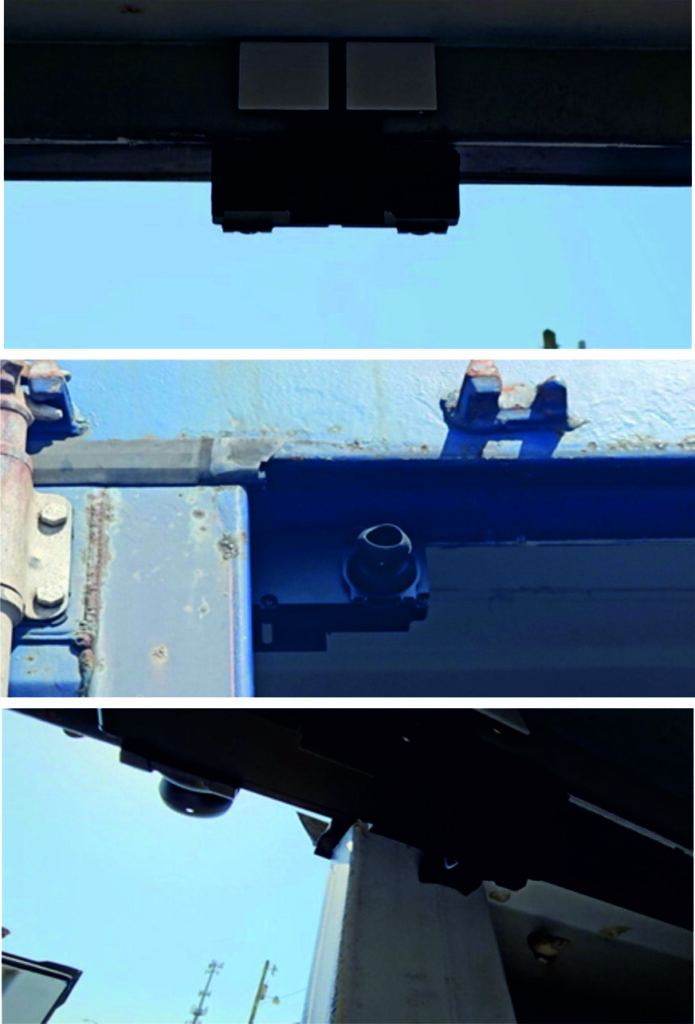
14. Photos of properly mounted Unit.
1. 靴子和夹子——预组装。
2. 通过将保护罩上的方形凹口与夹子上的方形切口对齐,组装保护罩和夹子。
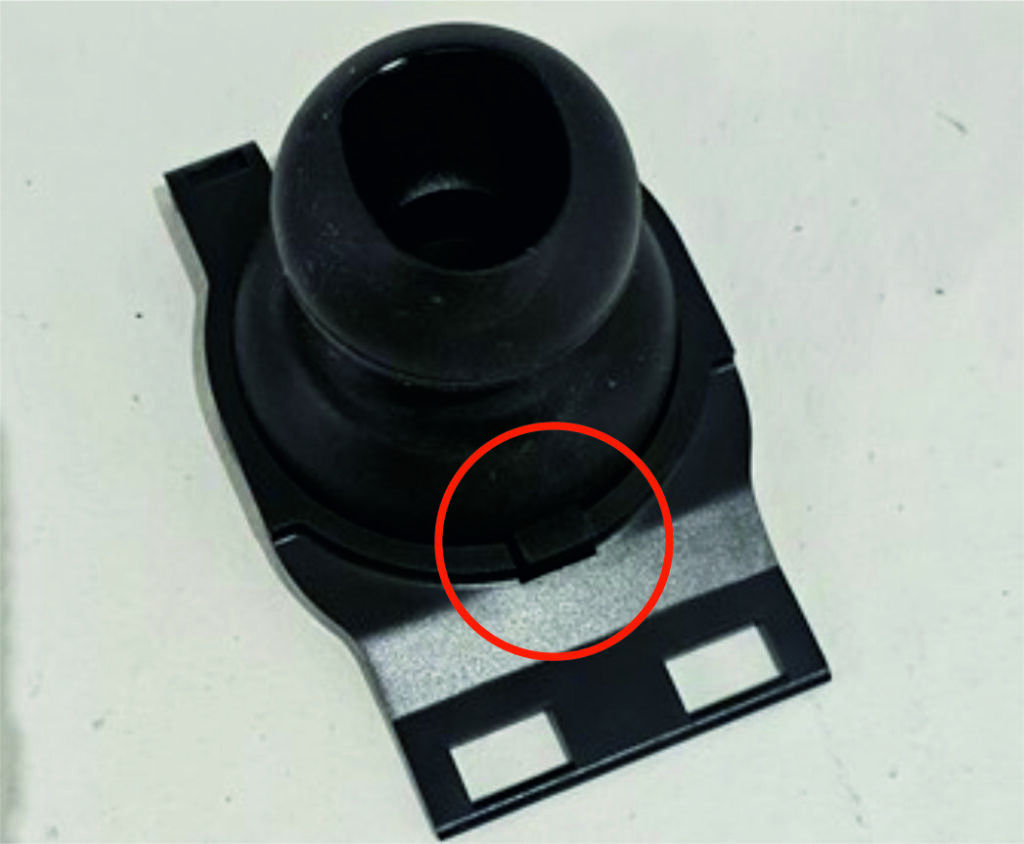
3. 组装好的夹子和护套如图所示放置在设备上。请注意组装的方向。设备“顶部”的两个标签应如图所示对齐。

4. 接下来按下,夹子将与 EyeSeal® 设备的底部接合。

5. 图中显示了安装工具和翼形螺母。
6. 安装工具上的磁铁应朝向容器外部,与套管方向相同。
7. 使用提供的翼形螺母将安装工具连接到装置上。
注意:不要使用任何其他翼形螺母或螺钉。

8. 请注意已安装安装工具的组装装置。
9. 翼形螺母应“用手指拧紧”,以允许装置在部署到容器中时上下移动。
10. “装置开启” – 请注意位于“装置”后部的黄色标签。此标签位于“光传感器”上方。
11. 取下“黄色标签”,EyeSeal® 设备现在可在使用寿命内发挥作用。所有传感器现在都已启用并正在收集数据。必须小心处理以防止“误报”。

12. 安装工具应与两个集装箱门的中心对齐。同时,如图所示,与集装箱顶部接触。*** 一扇“关闭的门”可能有助于此过程对齐后,调整 EyeSeal 以连接到容器框架的顶部。 当磁性连接时,拧紧蝶形螺母

13. 通过比较如图所示的外门锁装置之间的‘距离’和位置,也可以确认‘安装工具’的对齐情况。

14. 正确安装的设备的照片。